How Do You Make A Kayak Cart?
Share this article:
TopNotch Outdoor is independent – we research, test, and rate the top products to help you make the right buying choice. We sometimes use affiliate links and may receive a small commission on your purchase. Learn more…
Kayaking
Kayaking is so much fun! You can add it as something to do on your camping trip or water outing.
It’s like gliding over the water, having control over where you’re going, and getting out of the crowded world, even just for a little while.
And whatever boat you have…
You’re surely going to need more than just your shoulders and arms to take it to the water’s edge. In other words, you’re certainly going to need a kayak cart. So How Do You Make A Kayak Cart?
Kayaks range from 20 pounds to over 300 pounds. A 100-pound one is already considered a heavy kayak. You need to transport your kayak carefully transported so its safety on the water won’t be breached.
A kayak cart is super handy in this.
But you already know that!
You probably wouldn’t be here if you don’t already have a kayak – or a bunch of them – that you want to carry from one beach or lake to another safely.
So tools out, handyman…
Let’s get crafty!
DIY Kayak Cart
There’s a lot of kayak carts on the market. Most of them are of good quality and worthy of the price you pay. You can just go to the local store, surf the internet, and you’ll have your cart in no time.
But where’s the fun in that?
And let’s face it – you’d rather spend the money on your next boat or paddle. Not on the trolley. Mainly because a DIY kayak cart is so easy and affordable to make!
No need to worry… We’ll go over every detail for each step.
But first…
Here’s a complete list of tools and materials you need to build your DIY kayak cart like it’s no one’s business!
Tools:
The main tools you’re going to need are the hacksaw, a measuring tape, the… Oh, wait… That’s it! You’ll need it to cut the materials to the necessary length.
Since you’ll be using a PVC pipe – this is a PVC kayak cart, by the way – you can also bring out your PVC cutter or cut-off wheels. Both are optional. A miter saw is also okay if that’s what you have.
See?
Not so complicated so far, right?
Materials for your DIY kayak cart:
PVC Pipe:
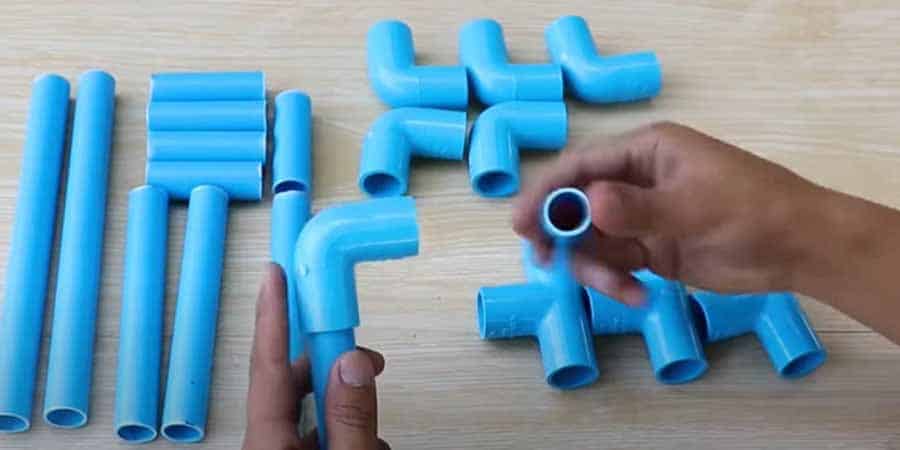
- 10-foot PVC pipe, ¾-inch diameter x 1 pc
- 2-foot schedule 40 PVC pipe, ¾-inch diameter x 1 pc
PVC Joints:
- 90-degree x 4 pcs
- 45-degree x 8 pcs
- PVC Tee fittings x 4 pcs
- PVC crosses x 4 pcs
Wheels:
- 6-inch hand truck wheels x 2 pcs
- 5/8th cut washers x 2 pcs
- 5/8th lock washers x 2 pcs
- 5/8th stainless steel nuts x 4 pcs
Note: the wheels can be found in the hardware store. Like Lowes and Harbor Freight, etc. But you can substitute them for lawn mower wheels, golf bag cart tires, or whatever is at hand
Assembly:
- ¾-inch to ½-inch PVC bushings x 2 pcs – not PVC caps
- PVC glue or all-purpose cement
- 36-inch 5/8th threaded rod
- Zip ties x 6 or more for good measure
Others:
- One pool noodle
- Tie-down straps or whatever’s available x 2 pcs
Is everything ready?
Now you can start putting together your PVC kayak cart!
Directions for DIY kayak cart:(Step-by-step instructions)
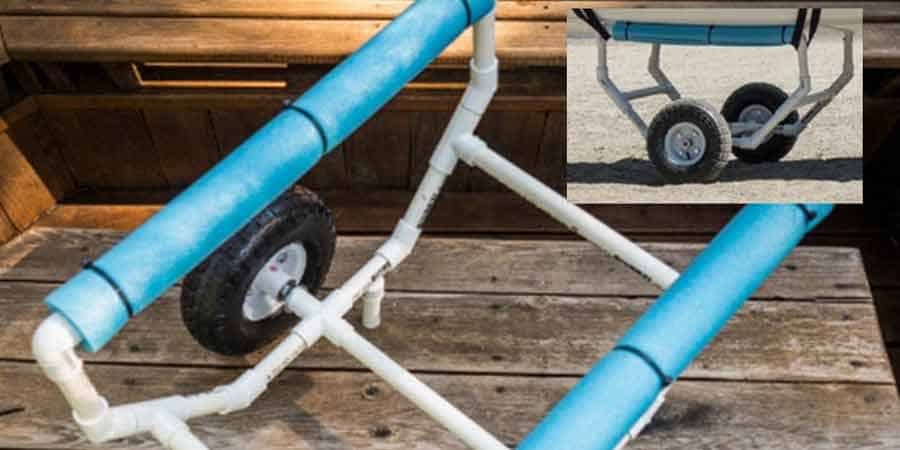
I’ve rummaged through the internet to get an excellent idea for a DIY kayak cart design. Most of them, I found out, are PVC kayak carts. The reviews about this kind of cart are glowing.
I’ve read that they’re easy to make cheaply. They’re durable, too, if the steps are done right. Also, when you take care of your kayak cart well.
So here we are!
The directions are easy to follow.
I thought it was going to take me a few hours to complete the entire assembly. But I found this particular design just right for my kayaks – and my “engineering” skills.
It’s based on different designs and procedures that I found online, and I gave it a few tweaks to suit my taste.
But enough about me…
Let’s now get to making your DIY kayak cart!
Step 1: Measure your boat
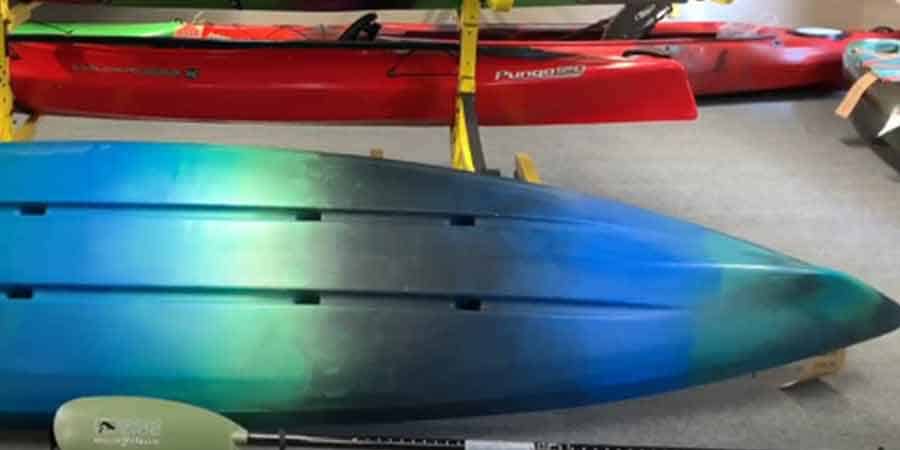
The correct length of the width under the cockpit is the critical measurement that you’ll need. This is the basis of your cart’s frame size.
I have kayaks of varying sizes, but I used my 19-inch for this guide.
Should it be custom-fit? No, and neither is it a one-size-fits-all cart.
But what’s essential is…
The frame should be wide enough to be stable but narrow enough so the cockpit can sit on top of the arms.
You’ll understand as we go along, no worries!
Step 2: Cut PVC pipe pieces.
Now take the hacksaw or your PVC cutter and strengthen your shoulders. This is where the sweat comes out.
Important note: Make sure your measurements are on-point before you cut the pipes. This is crucial for the stability of your kayak cart.
Now cut the following lengths:
- 14-inch x 3 pcs
- 23-inch x 2 pcs
- 5-inch x 8 pcs
- 2-inch x 4 pcs
Step 3: Group your parts.
Get your 23-inch piece and use it as the reference point – this piece is your top bar or the arms of the cart. Starting at one end, place the other parts correct to loop to the other end of the top bar.
In this particular order:
- 90-degree joint
- 4-inch piece
- 45-degree joint
- 2-inch piece
- Tee fitting – the tail should face away from your floor or tabletop
- 4-inch piece
- 45-degree joint
- 4-inch piece
- Cross joint – the tails should be perpendicular to your floor or tabletop, not the top bar; take note that this is where you’ll glue the pipe for your hollow axle
- 4-inch piece
- 45-degree joint
- 4-inch piece
- Tee fitting – again, this should face away from your floor or tabletop
- 2-inch piece
- 45-degree joint
- 4-inch piece
- 90-degree joint – this should meet the other end of the top bar
Make another one of these because your cart should have two arms.
Now to the next step!
Step 4: Let’s stick them together.
I prefer using PVC glue instead of all-purpose cement because the latter dries quicker. But you do you.
Just make sure…
Your joints and pieces should be ready once you’ve started applying the glue.
Apply the glue at the ends of the PVC pipes on the outer wall. Then insert it into the joints and hold on to it as the glue or cement dries. This makes sure it stays firm.
Again, you’re going to do this twice, for there should be two arms.
As an alternative…
You can drill holes at the joints and screw them together. You’ll just need to shell out more bucks if you want that. But whatever you do…
Just remember to keep it straight and watch out for the angles!
Step 5: Join the two cart arms.
Get the 14-inch pieces and apply glue on one end of each, the same way as before. Then insert each piece into the T fittings and cross joint of one of the arms.
(You can insert the pipes without glue first and do a test fit if you want to make sure it’s the right measurement for your kayak.)
Take note: The three parts should all point in the same direction.
On the other ends of the 14-inch pieces, apply some glue or cement again and insert them into the joints of the other arm.
And voila! We’ve just witnessed the joining of two cart arms.
Then get the PVC bushings (not PVC end caps) and insert them into the outer tails of the cross joints. Don’t get your bushing confused with the end cap. The end caps are covered, while bushings are open-ended.
Now you can go to the bottom assembly of your cart.
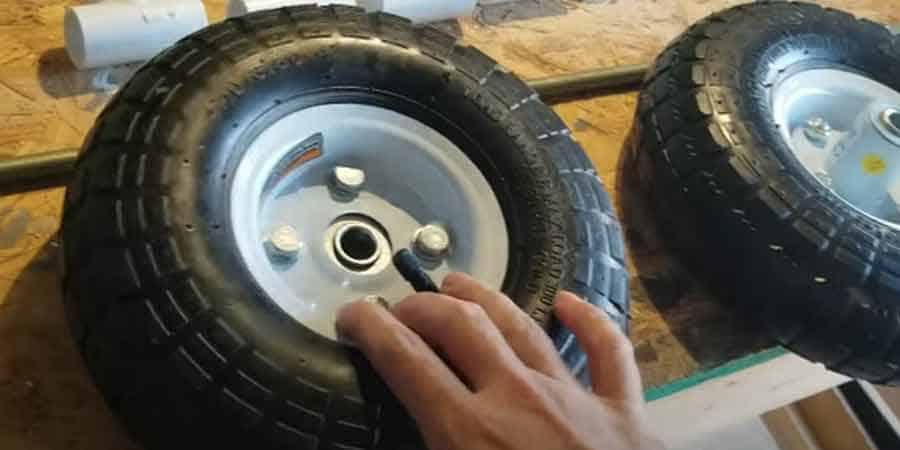
Step 6: Measure the axle.
Get your threaded rod and slide it through the cross joints of your joined cart arms across the entire lower portion. On one end of the rod, place the following, in this particular order:
- One cut washer
- One nut
- One wheel
- One lock washer
- One nut – this is not a typo error; you have to put another one
- Note: leave two rod threads jutting out of the last nut
Repeat it on the other end of the rod.
This is the axle of your kayak cart. The threaded rod holds your tires in place. So you have to make sure that the two wheels should be at the proper placement. Not too loose, not too tight.
It should be fit enough, so the cart is stable. But don’t make it too tight that the wheels don’t turn – just a friendly reminder!
Put a mark on the end with the extra rod, two threads after the last nut. Then take apart the wheels, lock washers, outer and inner nuts and slide the rod out again.
Because…
Step 7: Wheel assembly.
…It’s cutting time once more!
If you have great control over your hacksaw, go ahead and use it. But a cut-off wheel is more precise. Again, you do you.
Just make sure that you cut precisely on the mark you made. You can use a file after to blunt off sharp edges.
Then, reassemble the axle the same way that you did one step earlier. You can put outer bolts as well for added security.
Step 8: Add padding.

You’re almost done…
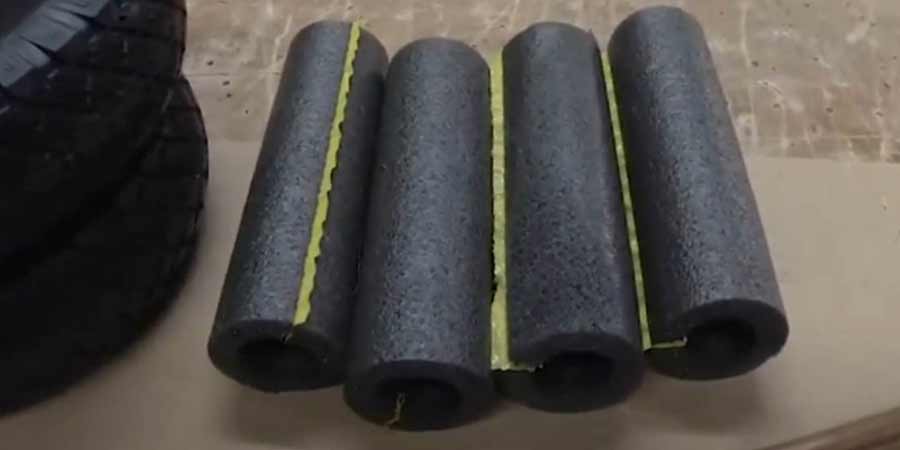
Get your pool noodle and cut two 22-inch pieces. This will serve as the padding for the arms. It’s for your kayak hull’s protection – so this is important.
Cut your pool noodles lengthwise, but just on one side. Slip the paddings on both arms of your cart and secure them using the zip ties. I think three for each arm is enough (one at both ends and the center).
Step 9: Go kayaking with your PVC kayak cart!
And just one last step…
Place your kayak’s hull on top of the arms of your new kayak cart, secure it with your chosen strap, and…
To the water, you go!
Conclusion: How Do You Make A Kayak Cart
Yes, my fellow kayak paddler, your DIY kayak cart is done and ready to use!
How long did it take you?
The building process took me about an hour to get everything done once I got the hang of it. And the total cost didn’t exceed 50 bucks!
This cart is suitable for flat, uneven, soft, or rough terrain, depending on your wheels. It doesn’t need a kick stand, unlike the other models. That’s why I love this cart.
The measurements used in this guide are fit for 16 to 20-inch kayak width. If you have a bigger boat, you need only to change the length of your axle.
So now…
Your cart awaits you!
Related: Best Kayak Cart


![Top 11 Best Small Motorhomes [currentyear] Top 11 Best Small Motorhomes 2024](https://topnotchoutdoor.com/wp-content/uploads/2021/07/11-Best-Small-Motorhomes-FI.webp)
![Onyx Kayak Fishing Life Jacket: Definitive Review ([currentyear]) Onyx Kayak Fishing Life Jacket: Definitive Review (2024)](https://topnotchoutdoor.com/wp-content/uploads/2021/03/Onyx-Kayak-Fishing-Life-Jacket-FI-768x480.jpg)

